Indulge Guilt-Free: 10 Irresistible Sugar-Free Desserts You Can Make Tonight!
Sure! Please provide the recipe you'd like me to rewrite, and I'll be happy to help you with it.
https://hillrecipes.com/10-delicious-sugar-free-desserts-youll-want-to-make-tonight/
Showing posts with label patisser. Show all posts
Showing posts with label patisser. Show all posts
Boost Your Afternoon Energy: Delicious Low-Carb Lunches You’ll Love!
Boost Your Afternoon Energy: Delicious Low-Carb Lunches You’ll Love!
Title: Savory Herb Chicken Delight 🍗🌿
Intro: Elevate your dinner with this aromatic herb chicken that's so delicious, your taste buds will dance! 🍽️
Ingredients:
- 4 boneless, skinless chicken breasts
- 1 teaspoon dried oregano
- 1 large onion, chopped
- 3 cloves garlic, minced
- 1 cup chicken broth
- 1 tablespoon olive oil
- 1 teaspoon black pepper
- Salt to taste
- 2 tablespoons lemon juice
- 1 teaspoon rosemary
- 1 tablespoon soy sauce
Instructions:
1. Begin by heating the olive oil in a large pan over medium heat. Once shimmering, add the chopped onion and cook until translucent.
2. Stir in the minced garlic, cooking until it's fragrant—about 1 minute.
3. Add the chicken breasts to the pan and season them with oregano, rosemary, black pepper, and a pinch of salt. Sear each side until golden, about 4 minutes per side.
4. Pour in the chicken broth and soy sauce, ensuring it covers the chicken. Let it simmer, partially covered, for about 20 minutes.
5. As the chicken cooks, add the lemon juice, allowing the flavors to meld beautifully. This will give your chicken a nice, zesty touch.
6. Ensure the chicken is cooked through by checking its internal temperature—it should register at least 165°F (75°C).
7. Once cooked, remove the chicken and let it rest for a few minutes before serving. This keeps it juicy and tender.
Nutritional Information: This dish is high in protein, low in carbs, and provides a good source of essential minerals and vitamins.
Time: Preparation time: 10 minutes | Cooking time: 30 minutes
https://hillrecipes.com/satisfying-low-carb-lunches-to-fuel-your-afternoon/
Title: "Savor the Heartwarming Comfort of 10 Classic Dishes to Nourish Your Soul
Title: "Savor the Heartwarming Comfort of 10 Classic Dishes to Nourish Your Soul
Title: Vegetable Delight with a Flavor Twist 🌿✨
Intro: Dive into this delicious veggie dish that brings vibrant flavors and colors to your table! 🌈🥦
Ingredients:
- 2 tablespoons olive oil
- 1 teaspoon dried basil
- 2 cloves garlic, minced
- 1 can (15 ounces) white beans, drained and rinsed
- 1 cup vegetable broth
- 2 cups baby spinach
- Salt and pepper to taste
- 1 medium onion, chopped
- 1 zucchini, sliced
- 1 red bell pepper, chopped
- 1 tablespoon lemon juice
Instructions:
1. Heat the olive oil in a large skillet over medium heat. Add the chopped onion and minced garlic, and sauté until the onion becomes translucent.
2. Toss in the chopped red bell pepper and sliced zucchini. Stir them occasionally, allowing them to soften and develop a light golden color.
3. Pour in the vegetable broth and sprinkle in the dried basil. Stir to combine all the flavors.
4. Add the white beans to the skillet, mixing them in with the fragrant veggies. Allow them to warm through, soaking up the surrounding flavors.
5. Adjust the taste with salt and pepper. Next, add the baby spinach, gently folding it into the mixture until it wilts.
6. Finally, drizzle in the lemon juice, giving the dish a fresh zesty lift. Serve hot and enjoy the burst of flavors!
Nutritional Information: High in fiber, rich in vitamins A and C, and a good source of plant-based protein.
Time: Preparation time: 15 minutes | Cooking time: 20 minutes
https://hillrecipes.com/10-classic-comfort-foods-to-warm-your-soul/
Input:
Post Content: Hearty and Flavorful Mushroom and Herb Risotto: A One-Pot Wonder
When time is tight, but you're craving a meal that doesn’t skimp on flavor, this Mushroom and Herb Risotto is your go-to dish. It brings together the earthy flavors of mushrooms and the freshness of herbs in a creamy, comforting bowl that can be prepared all in one pot. Perfect for busy weeknights and sure to impress your family or guests, this risotto is simple to make and delivers that satisfying taste that you'll want to make over and over.
Ingredients
- 1 tablespoon olive oil
- 1 tablespoon unsalted butter
- 1 medium onion, finely diced
- 2 garlic cloves, minced
- 1 cup Arborio rice
- 4 cups vegetable broth, warmed
- 1 cup sliced mushrooms (such as cremini, shiitake, or button)
- 1 teaspoon dried thyme (or 2 teaspoons fresh thyme, chopped)
- Salt and freshly ground pepper, to taste
- 3/4 cup grated Parmesan cheese (or nutritional yeast for a vegan option)
- 2 tablespoons fresh parsley, chopped (for garnish)
- Optional: 1/4 cup cream or plant-based milk (for extra creaminess)
Instructions
Sauté the Aromatics: In a large pot, heat the olive oil and butter over medium heat until melted and shimmering. Add the diced onion and garlic, stirring occasionally for about 3-5 minutes, or until the onion is translucent and fragrant.
Toast the Rice: Add the Arborio rice to the pot and stir for about 1-2 minutes. This step helps to toast the rice, enhancing its nutty flavor and preparing it to absorb liquid beautifully.
Introduce the Broth: Slowly pour in the warmed vegetable broth, one ladle at a time, while stirring gently. Allow the rice to absorb the broth completely before adding the next ladle. This gradual process is key to achieving the perfect creamy texture that risotto is known for.
Add the Mushrooms and Herbs: After about 10 minutes of cooking and stirring, add the sliced mushrooms and thyme to the pot. Continue to cook, stirring often, as the mushrooms wilt and the risotto becomes thicker. This usually takes an additional 10-15 minutes.
Season and Finish: Once the rice is tender and the risotto is creamy, remove it from heat. Stir in the grated Parmesan cheese (or nutritional yeast) for richness, and season with salt and pepper to taste. For an over-the-top creamy texture, drizzle in the optional cream or plant-based milk.
- Garnish and Serve: Serve the risotto hot, garnished with fresh parsley for a touch of color and added freshness. Enjoy this delightful one-pot meal with a side salad or some crusty bread.
Conclusion
This Mushroom and Herb Risotto is not just a meal; it's a warm hug in a bowl, and it only takes your efforts in one pot. Perfect for busy weeknights when you want something quick yet comforting, this dish can easily impress your loved ones. The best part? You can customize it by adding your favorite seasonal vegetables or changing up the herbs according to your taste preferences.
FAQs
Can I make this risotto in advance?
While risotto is best enjoyed fresh, you can make it ahead and store it in the refrigerator for up to 2 days. Reheat gently on the stove, adding a splash of vegetable broth to restore its creamy texture.
What can I substitute for Arborio rice?
While Arborio rice is ideal for its creamy results, you can also use other short-grain rice varieties, such as Carnaroli or Vialone Nano. If you're looking for a lower-carb option, cauliflower rice can also be used, but it will require different cooking techniques.
Can I add other vegetables?
Absolutely! Asparagus, peas, spinach, or zucchini are excellent additions to risotto. If using fresh vegetables, add them during the last 5 minutes of cooking to maintain their vibrant color and texture.
Is there a vegan version?
Yes! Simply replace the butter with additional olive oil, the Parmesan cheese with nutritional yeast or a vegan cheese alternative, and use plant-based cream or milk for added richness.
How can I make this dish spicier?
Add a pinch of red pepper flakes during the cooking process or stir in some fresh chili when sautéing the onions to give the risotto a kick.
With this Mushroom and Herb Risotto as part of your cooking repertoire, you'll find that even the busiest of weeknights can have a delicious and satisfying dining experience. So gather your ingredients, pick out your favorite herbs, and let this one-pot wonder bring warmth to your table!
Task for AI:
Generate a unique, concise, and engaging post title based on the provided content.
Output Requirements:
✅ Keep the title within 10–15 words.
✅ Make it attention-grabbing and relevant to the content.
✅ Use persuasive or intriguing language to spark interest.
✅ Avoid generic or vague phrasing—make it stand out!
Please write in English language.
Sauté the Aromatics: In a large pot, heat the olive oil and butter over medium heat until melted and shimmering. Add the diced onion and garlic, stirring occasionally for about 3-5 minutes, or until the onion is translucent and fragrant.
Toast the Rice: Add the Arborio rice to the pot and stir for about 1-2 minutes. This step helps to toast the rice, enhancing its nutty flavor and preparing it to absorb liquid beautifully.
Introduce the Broth: Slowly pour in the warmed vegetable broth, one ladle at a time, while stirring gently. Allow the rice to absorb the broth completely before adding the next ladle. This gradual process is key to achieving the perfect creamy texture that risotto is known for.
Add the Mushrooms and Herbs: After about 10 minutes of cooking and stirring, add the sliced mushrooms and thyme to the pot. Continue to cook, stirring often, as the mushrooms wilt and the risotto becomes thicker. This usually takes an additional 10-15 minutes.
Season and Finish: Once the rice is tender and the risotto is creamy, remove it from heat. Stir in the grated Parmesan cheese (or nutritional yeast) for richness, and season with salt and pepper to taste. For an over-the-top creamy texture, drizzle in the optional cream or plant-based milk.
While risotto is best enjoyed fresh, you can make it ahead and store it in the refrigerator for up to 2 days. Reheat gently on the stove, adding a splash of vegetable broth to restore its creamy texture.
While Arborio rice is ideal for its creamy results, you can also use other short-grain rice varieties, such as Carnaroli or Vialone Nano. If you're looking for a lower-carb option, cauliflower rice can also be used, but it will require different cooking techniques.
Absolutely! Asparagus, peas, spinach, or zucchini are excellent additions to risotto. If using fresh vegetables, add them during the last 5 minutes of cooking to maintain their vibrant color and texture.
Yes! Simply replace the butter with additional olive oil, the Parmesan cheese with nutritional yeast or a vegan cheese alternative, and use plant-based cream or milk for added richness.
Add a pinch of red pepper flakes during the cooking process or stir in some fresh chili when sautéing the onions to give the risotto a kick.
Input:
Post Content:
Task for AI:
Generate a unique, concise, and engaging post title based on the provided content.
Output Requirements:
✅ Keep the title within 10–15 words.
✅ Make it attention-grabbing and relevant to the content.
✅ Use persuasive or intriguing language to spark interest.
✅ Avoid generic or vague phrasing—make it stand out!
Please write in English language.
One-Pot Wonders: Quick and Easy Meals for Busy Weeknights
https://hillrecipes.com/one-pot-wonders-quick-and-easy-meals-for-busy-weeknights/
Post Content:
Hearty and Flavorful Mushroom and Herb Risotto: A One-Pot Wonder
When time is tight, but you're craving a meal that doesn’t skimp on flavor, this Mushroom and Herb Risotto is your go-to dish. It brings together the earthy flavors of mushrooms and the freshness of herbs in a creamy, comforting bowl that can be prepared all in one pot. Perfect for busy weeknights and sure to impress your family or guests, this risotto is simple to make and delivers that satisfying taste that you'll want to make over and over.
Ingredients
- 1 tablespoon olive oil
- 1 tablespoon unsalted butter
- 1 medium onion, finely diced
- 2 garlic cloves, minced
- 1 cup Arborio rice
- 4 cups vegetable broth, warmed
- 1 cup sliced mushrooms (such as cremini, shiitake, or button)
- 1 teaspoon dried thyme (or 2 teaspoons fresh thyme, chopped)
- Salt and freshly ground pepper, to taste
- 3/4 cup grated Parmesan cheese (or nutritional yeast for a vegan option)
- 2 tablespoons fresh parsley, chopped (for garnish)
- Optional: 1/4 cup cream or plant-based milk (for extra creaminess)
Instructions
Sauté the Aromatics: In a large pot, heat the olive oil and butter over medium heat until melted and shimmering. Add the diced onion and garlic, stirring occasionally for about 3-5 minutes, or until the onion is translucent and fragrant.
Toast the Rice: Add the Arborio rice to the pot and stir for about 1-2 minutes. This step helps to toast the rice, enhancing its nutty flavor and preparing it to absorb liquid beautifully.
Introduce the Broth: Slowly pour in the warmed vegetable broth, one ladle at a time, while stirring gently. Allow the rice to absorb the broth completely before adding the next ladle. This gradual process is key to achieving the perfect creamy texture that risotto is known for.
Add the Mushrooms and Herbs: After about 10 minutes of cooking and stirring, add the sliced mushrooms and thyme to the pot. Continue to cook, stirring often, as the mushrooms wilt and the risotto becomes thicker. This usually takes an additional 10-15 minutes.
Season and Finish: Once the rice is tender and the risotto is creamy, remove it from heat. Stir in the grated Parmesan cheese (or nutritional yeast) for richness, and season with salt and pepper to taste. For an over-the-top creamy texture, drizzle in the optional cream or plant-based milk.
- Garnish and Serve: Serve the risotto hot, garnished with fresh parsley for a touch of color and added freshness. Enjoy this delightful one-pot meal with a side salad or some crusty bread.
Conclusion
This Mushroom and Herb Risotto is not just a meal; it's a warm hug in a bowl, and it only takes your efforts in one pot. Perfect for busy weeknights when you want something quick yet comforting, this dish can easily impress your loved ones. The best part? You can customize it by adding your favorite seasonal vegetables or changing up the herbs according to your taste preferences.
FAQs
Can I make this risotto in advance?
While risotto is best enjoyed fresh, you can make it ahead and store it in the refrigerator for up to 2 days. Reheat gently on the stove, adding a splash of vegetable broth to restore its creamy texture.
What can I substitute for Arborio rice?
While Arborio rice is ideal for its creamy results, you can also use other short-grain rice varieties, such as Carnaroli or Vialone Nano. If you're looking for a lower-carb option, cauliflower rice can also be used, but it will require different cooking techniques.
Can I add other vegetables?
Absolutely! Asparagus, peas, spinach, or zucchini are excellent additions to risotto. If using fresh vegetables, add them during the last 5 minutes of cooking to maintain their vibrant color and texture.
Is there a vegan version?
Yes! Simply replace the butter with additional olive oil, the Parmesan cheese with nutritional yeast or a vegan cheese alternative, and use plant-based cream or milk for added richness.
How can I make this dish spicier?
Add a pinch of red pepper flakes during the cooking process or stir in some fresh chili when sautéing the onions to give the risotto a kick.
With this Mushroom and Herb Risotto as part of your cooking repertoire, you'll find that even the busiest of weeknights can have a delicious and satisfying dining experience. So gather your ingredients, pick out your favorite herbs, and let this one-pot wonder bring warmth to your table!
Task for AI:
Generate a unique, concise, and engaging post title based on the provided content.
Output Requirements:
✅ Keep the title within 10–15 words.
✅ Make it attention-grabbing and relevant to the content.
✅ Use persuasive or intriguing language to spark interest.
✅ Avoid generic or vague phrasing—make it stand out!
Please write in English language.
One-Pot Wonders: Quick and Easy Meals for Busy Weeknights
https://hillrecipes.com/one-pot-wonders-quick-and-easy-meals-for-busy-weeknights/
Input:
Post Content: Roasting chicken is a kitchen skill that every home cook should master. Not only is it an economical way to feed a crowd, but it also results in succulent meat and crispy skin, making for a delectable meal. In this ultimate guide, we will explore everything you need to know about roasting chicken, from the selection of the chicken to the cooking techniques, recipes, and tips for leftovers. Let’s dive in!
Chapter 1: Choosing the Right Chicken
Before we get to the recipes, let’s talk about how to select the best chicken for roasting. There are several factors to consider:
-
- Whole vs Cut-Up: A whole chicken is typically juicier and results in better flavor, while cut-up pieces can cook faster and are easier to serve.
-
- Organic vs Conventional: Organic chickens are raised without antibiotics or added hormones and often have a richer flavor, making them a preferable choice for roasting.
-
- Size Matters: A chicken weighing about 4 to 5 pounds is ideal for roasting, as it cooks evenly and is manageable in most standard ovens.
-
- Fresh vs Frozen: Fresh chickens tend to have better texture and flavor, but frozen chickens can be just as good if thawed properly.
Chapter 2: Preparing Your Chicken
Once you’ve selected your chicken, it’s time to prepare it for roasting. Here’s a basic preparation checklist:
-
- Thawing: If using a frozen chicken, make sure to thaw it in the fridge for at least 24 hours prior to roasting.
-
- Cleaning: Rinse the chicken under cold water and pat dry with paper towels. Removing excess moisture will help the skin become crispy.
-
- Trussing: Tie the legs together with kitchen twine and tuck the wing tips underneath the body to ensure even cooking.
Chapter 3: Seasoning Your Chicken
Seasoning your chicken is crucial for flavor. Here are some popular options:
-
- Salt and Pepper: The simplest yet most effective seasoning. Use kosher salt and freshly ground black pepper.
-
- Herbs and Spices: Fresh herbs like rosemary, thyme, or sage add aromatic flavor. A sprinkle of garlic powder or paprika can also enhance the taste.
-
- Marinades: Consider marinating your chicken in a mixture of olive oil, lemon juice, and herbs for a few hours to add depth of flavor.
Chapter 4: Roasting Techniques
There are several methods you can use to roast a chicken:
4.1 Traditional Roasting
Preheat your oven to 375°F (190°C). Place the chicken in a roasting pan, breast side up, and roast for about 20 minutes per pound. Baste with pan juices every 30 minutes for maximum flavor.
4.2 Spatchcocking
For faster cooking and crispy skin, consider spatchcocking your chicken. Cut out the backbone and flatten the chicken before seasoning and roasting.
4.3 Beer Can Chicken
This fun method involves inserting a can of beer (or other liquid) into the cavity of the chicken to steam it from the inside out, resulting in moist meat and crispy skin.
4.4 Sous Vide
Using sous vide ensures perfectly tender and juicy chicken. Cook the chicken in a water bath at 140°F (60°C) for 1-4 hours, then sear it in a hot skillet to finish.
Chapter 5: Timings and Temperatures
Getting the timing and temperatures right is essential for a perfectly roasted chicken:
-
- Whole Chicken: An average 4-5 pound chicken takes around 1.5 to 2 hours at 375°F (190°C).
-
- Internal Temperature: Always check that the internal temperature of the thickest part of the breast reaches 165°F (75°C) for safe consumption.
Chapter 6: Delicious Roast Chicken Recipes
6.1 Classic Roast Chicken
This classic recipe focuses on simplicity and flavor:
Ingredients:
- 1 whole chicken (4-5 lbs)
- 2 tablespoons olive oil
- 1 tablespoon salt
- 1 teaspoon black pepper
- 1 lemon, quartered
- Fresh herbs (thyme, rosemary)

Instructions:
1. Preheat the oven to 375°F (190°C).
2. Rub the chicken with olive oil, salt, and pepper.
3. Place the lemon and herbs inside the cavity.
4. Roast in the oven for 1.5 hours, basting occasionally.
5. Let rest for 10 minutes before carving.
6.2 Honey Garlic Roast Chicken
This dish offers a sweet and savory twist:
Ingredients:
- 1 whole chicken (4-5 lbs)
- 1/4 cup honey
- 1/4 cup soy sauce
- 4 cloves garlic, minced
- 1 teaspoon ginger, grated

Instructions:
1. Preheat the oven to 375°F (190°C).
2. Mix honey, soy sauce, garlic, and ginger in a bowl.
3. Rub the mixture over the chicken, reserving some for basting.
4. Roast for 1.5-2 hours, basting with sauce every 30 minutes.
5. Let rest, then serve with your choice of sides.
6.3 Herb Butter Roast Chicken
This recipe enhances flavor with aromatic herbs:
Ingredients:
- 1 whole chicken (4-5 lbs)
- 1/2 cup unsalted butter, softened
- 2 tablespoons fresh parsley, chopped
- 1 tablespoon fresh thyme, chopped
- 1 tablespoon garlic, minced

Instructions:
1. Preheat the oven to 375°F (190°C).
2. Combine butter, herbs, and garlic in a bowl.
3. Gently lift the skin of the chicken and spread the herb butter underneath.
4. Roast for about 1.5 hours, or until golden brown and cooked through.
5. Rest before carving and serving.
Chapter 7: Side Dishes for Roast Chicken
Pairing your roast chicken with the right side dishes can elevate your meal. Here are a few recommendations:
-
- Roasted Vegetables: Carrots, potatoes, and Brussels sprouts become caramelized and delicious when roasted alongside the chicken.
-
- Garlic Mashed Potatoes: Creamy and rich, these mashed potatoes compliment the savory flavors of the chicken.
-
- Green Salad: A refreshing salad with a light vinaigrette balances the richness of the roasted chicken.
Chapter 8: Storing and Using Leftovers
Once you’ve enjoyed your roast chicken, you’ll likely have leftovers. Here’s how to store and use them:
-
- Storage: Store leftover chicken in an airtight container in the fridge for up to 3 days.
-
- Freezing: You can also freeze cooked chicken for up to 3 months. Be sure to slice or shred it before freezing for easier use later.
-
- Recipes: Use leftover chicken for salads, sandwiches, or casseroles. It’s a great addition to soups or stir-fries as well.
Conclusion
Roasting chicken is a timeless technique that yields delicious results. With a little practice and the right recipes, you can create meals that impress your family and friends. Remember to choose quality ingredients, experiment with flavors, and enjoy the process of cooking. Whether you stick to traditional roasts or explore fun variations like beer can chicken, the joy of a perfectly roasted chicken is in your hands. Happy roasting!
FAQs
1. How long should I let the chicken rest after roasting?
It’s best to let the chicken rest for about 10-15 minutes before carving. This allows the juices to redistribute, resulting in moister meat.
2. Can I roast a frozen chicken?
It’s not recommended to roast a frozen chicken as it will not cook evenly. Always thaw it completely in the fridge before roasting.
3. What temperature should I roast chicken at?
The most common temperature is 375°F (190°C). This allows for even cooking and crispy skin.
4. Do I need to cover the chicken while roasting?
If you want the skin to remain golden and crispy, avoid covering it. If it starts to brown too quickly, you can loosely cover it with foil towards the end of cooking.
5. What is the best way to season a chicken?
A simple seasoning of salt, pepper, and herbs works wonders. However, feel free to experiment with marinades or spice blends for added flavor.
Task for AI:
Generate a unique, concise, and engaging post title based on the provided content.
Output Requirements:
✅ Keep the title within 10–15 words.
✅ Make it attention-grabbing and relevant to the content.
✅ Use persuasive or intriguing language to spark interest.
✅ Avoid generic or vague phrasing—make it stand out!
Please write in English language.
- Whole vs Cut-Up: A whole chicken is typically juicier and results in better flavor, while cut-up pieces can cook faster and are easier to serve.
- Organic vs Conventional: Organic chickens are raised without antibiotics or added hormones and often have a richer flavor, making them a preferable choice for roasting.
- Size Matters: A chicken weighing about 4 to 5 pounds is ideal for roasting, as it cooks evenly and is manageable in most standard ovens.
- Fresh vs Frozen: Fresh chickens tend to have better texture and flavor, but frozen chickens can be just as good if thawed properly.
- Thawing: If using a frozen chicken, make sure to thaw it in the fridge for at least 24 hours prior to roasting.
- Cleaning: Rinse the chicken under cold water and pat dry with paper towels. Removing excess moisture will help the skin become crispy.
- Trussing: Tie the legs together with kitchen twine and tuck the wing tips underneath the body to ensure even cooking.
- Salt and Pepper: The simplest yet most effective seasoning. Use kosher salt and freshly ground black pepper.
- Herbs and Spices: Fresh herbs like rosemary, thyme, or sage add aromatic flavor. A sprinkle of garlic powder or paprika can also enhance the taste.
- Marinades: Consider marinating your chicken in a mixture of olive oil, lemon juice, and herbs for a few hours to add depth of flavor.
- Whole Chicken: An average 4-5 pound chicken takes around 1.5 to 2 hours at 375°F (190°C).
- Internal Temperature: Always check that the internal temperature of the thickest part of the breast reaches 165°F (75°C) for safe consumption.
- Roasted Vegetables: Carrots, potatoes, and Brussels sprouts become caramelized and delicious when roasted alongside the chicken.
- Garlic Mashed Potatoes: Creamy and rich, these mashed potatoes compliment the savory flavors of the chicken.
- Green Salad: A refreshing salad with a light vinaigrette balances the richness of the roasted chicken.
- Storage: Store leftover chicken in an airtight container in the fridge for up to 3 days.
- Freezing: You can also freeze cooked chicken for up to 3 months. Be sure to slice or shred it before freezing for easier use later.
- Recipes: Use leftover chicken for salads, sandwiches, or casseroles. It’s a great addition to soups or stir-fries as well.
Input:
Post Content: Roasting chicken is a kitchen skill that every home cook should master. Not only is it an economical way to feed a crowd, but it also results in succulent meat and crispy skin, making for a delectable meal. In this ultimate guide, we will explore everything you need to know about roasting chicken, from the selection of the chicken to the cooking techniques, recipes, and tips for leftovers. Let’s dive in!
Before we get to the recipes, let’s talk about how to select the best chicken for roasting. There are several factors to consider:
Once you’ve selected your chicken, it’s time to prepare it for roasting. Here’s a basic preparation checklist:
Seasoning your chicken is crucial for flavor. Here are some popular options:
There are several methods you can use to roast a chicken:
Preheat your oven to 375°F (190°C). Place the chicken in a roasting pan, breast side up, and roast for about 20 minutes per pound. Baste with pan juices every 30 minutes for maximum flavor.
For faster cooking and crispy skin, consider spatchcocking your chicken. Cut out the backbone and flatten the chicken before seasoning and roasting.
This fun method involves inserting a can of beer (or other liquid) into the cavity of the chicken to steam it from the inside out, resulting in moist meat and crispy skin.
Using sous vide ensures perfectly tender and juicy chicken. Cook the chicken in a water bath at 140°F (60°C) for 1-4 hours, then sear it in a hot skillet to finish.
Getting the timing and temperatures right is essential for a perfectly roasted chicken:
This classic recipe focuses on simplicity and flavor:
This dish offers a sweet and savory twist:
This recipe enhances flavor with aromatic herbs:
Pairing your roast chicken with the right side dishes can elevate your meal. Here are a few recommendations:
Once you’ve enjoyed your roast chicken, you’ll likely have leftovers. Here’s how to store and use them:
Roasting chicken is a timeless technique that yields delicious results. With a little practice and the right recipes, you can create meals that impress your family and friends. Remember to choose quality ingredients, experiment with flavors, and enjoy the process of cooking. Whether you stick to traditional roasts or explore fun variations like beer can chicken, the joy of a perfectly roasted chicken is in your hands. Happy roasting!
It’s best to let the chicken rest for about 10-15 minutes before carving. This allows the juices to redistribute, resulting in moister meat.
It’s not recommended to roast a frozen chicken as it will not cook evenly. Always thaw it completely in the fridge before roasting.
The most common temperature is 375°F (190°C). This allows for even cooking and crispy skin.
If you want the skin to remain golden and crispy, avoid covering it. If it starts to brown too quickly, you can loosely cover it with foil towards the end of cooking.
A simple seasoning of salt, pepper, and herbs works wonders. However, feel free to experiment with marinades or spice blends for added flavor.
Task for AI:
Generate a unique, concise, and engaging post title based on the provided content.
Output Requirements:
✅ Keep the title within 10–15 words.
✅ Make it attention-grabbing and relevant to the content.
✅ Use persuasive or intriguing language to spark interest.
✅ Avoid generic or vague phrasing—make it stand out!
Please write in English language.
The Ultimate Guide to Roasting Chicken: Perfect Recipes for Dinner
https://hillrecipes.com/the-ultimate-guide-to-roasting-chicken-perfect-recipes-for-dinner/
Post Content: Roasting chicken is a kitchen skill that every home cook should master. Not only is it an economical way to feed a crowd, but it also results in succulent meat and crispy skin, making for a delectable meal. In this ultimate guide, we will explore everything you need to know about roasting chicken, from the selection of the chicken to the cooking techniques, recipes, and tips for leftovers. Let’s dive in!
Chapter 1: Choosing the Right Chicken
Before we get to the recipes, let’s talk about how to select the best chicken for roasting. There are several factors to consider:
- Whole vs Cut-Up: A whole chicken is typically juicier and results in better flavor, while cut-up pieces can cook faster and are easier to serve.
- Organic vs Conventional: Organic chickens are raised without antibiotics or added hormones and often have a richer flavor, making them a preferable choice for roasting.
- Size Matters: A chicken weighing about 4 to 5 pounds is ideal for roasting, as it cooks evenly and is manageable in most standard ovens.
- Fresh vs Frozen: Fresh chickens tend to have better texture and flavor, but frozen chickens can be just as good if thawed properly.
Chapter 2: Preparing Your Chicken
Once you’ve selected your chicken, it’s time to prepare it for roasting. Here’s a basic preparation checklist:
- Thawing: If using a frozen chicken, make sure to thaw it in the fridge for at least 24 hours prior to roasting.
- Cleaning: Rinse the chicken under cold water and pat dry with paper towels. Removing excess moisture will help the skin become crispy.
- Trussing: Tie the legs together with kitchen twine and tuck the wing tips underneath the body to ensure even cooking.
Chapter 3: Seasoning Your Chicken
Seasoning your chicken is crucial for flavor. Here are some popular options:
- Salt and Pepper: The simplest yet most effective seasoning. Use kosher salt and freshly ground black pepper.
- Herbs and Spices: Fresh herbs like rosemary, thyme, or sage add aromatic flavor. A sprinkle of garlic powder or paprika can also enhance the taste.
- Marinades: Consider marinating your chicken in a mixture of olive oil, lemon juice, and herbs for a few hours to add depth of flavor.
Chapter 4: Roasting Techniques
There are several methods you can use to roast a chicken:
4.1 Traditional Roasting
Preheat your oven to 375°F (190°C). Place the chicken in a roasting pan, breast side up, and roast for about 20 minutes per pound. Baste with pan juices every 30 minutes for maximum flavor.
4.2 Spatchcocking
For faster cooking and crispy skin, consider spatchcocking your chicken. Cut out the backbone and flatten the chicken before seasoning and roasting.
4.3 Beer Can Chicken
This fun method involves inserting a can of beer (or other liquid) into the cavity of the chicken to steam it from the inside out, resulting in moist meat and crispy skin.
4.4 Sous Vide
Using sous vide ensures perfectly tender and juicy chicken. Cook the chicken in a water bath at 140°F (60°C) for 1-4 hours, then sear it in a hot skillet to finish.
Chapter 5: Timings and Temperatures
Getting the timing and temperatures right is essential for a perfectly roasted chicken:
- Whole Chicken: An average 4-5 pound chicken takes around 1.5 to 2 hours at 375°F (190°C).
- Internal Temperature: Always check that the internal temperature of the thickest part of the breast reaches 165°F (75°C) for safe consumption.
Chapter 6: Delicious Roast Chicken Recipes
6.1 Classic Roast Chicken
This classic recipe focuses on simplicity and flavor:
Ingredients:
- 1 whole chicken (4-5 lbs)
- 2 tablespoons olive oil
- 1 tablespoon salt
- 1 teaspoon black pepper
- 1 lemon, quartered
- Fresh herbs (thyme, rosemary)

Instructions:
1. Preheat the oven to 375°F (190°C).
2. Rub the chicken with olive oil, salt, and pepper.
3. Place the lemon and herbs inside the cavity.
4. Roast in the oven for 1.5 hours, basting occasionally.
5. Let rest for 10 minutes before carving.
6.2 Honey Garlic Roast Chicken
This dish offers a sweet and savory twist:
Ingredients:
- 1 whole chicken (4-5 lbs)
- 1/4 cup honey
- 1/4 cup soy sauce
- 4 cloves garlic, minced
- 1 teaspoon ginger, grated

Instructions:
1. Preheat the oven to 375°F (190°C).
2. Mix honey, soy sauce, garlic, and ginger in a bowl.
3. Rub the mixture over the chicken, reserving some for basting.
4. Roast for 1.5-2 hours, basting with sauce every 30 minutes.
5. Let rest, then serve with your choice of sides.
6.3 Herb Butter Roast Chicken
This recipe enhances flavor with aromatic herbs:
Ingredients:
- 1 whole chicken (4-5 lbs)
- 1/2 cup unsalted butter, softened
- 2 tablespoons fresh parsley, chopped
- 1 tablespoon fresh thyme, chopped
- 1 tablespoon garlic, minced

Instructions:
1. Preheat the oven to 375°F (190°C).
2. Combine butter, herbs, and garlic in a bowl.
3. Gently lift the skin of the chicken and spread the herb butter underneath.
4. Roast for about 1.5 hours, or until golden brown and cooked through.
5. Rest before carving and serving.
Chapter 7: Side Dishes for Roast Chicken
Pairing your roast chicken with the right side dishes can elevate your meal. Here are a few recommendations:
- Roasted Vegetables: Carrots, potatoes, and Brussels sprouts become caramelized and delicious when roasted alongside the chicken.
- Garlic Mashed Potatoes: Creamy and rich, these mashed potatoes compliment the savory flavors of the chicken.
- Green Salad: A refreshing salad with a light vinaigrette balances the richness of the roasted chicken.
Chapter 8: Storing and Using Leftovers
Once you’ve enjoyed your roast chicken, you’ll likely have leftovers. Here’s how to store and use them:
- Storage: Store leftover chicken in an airtight container in the fridge for up to 3 days.
- Freezing: You can also freeze cooked chicken for up to 3 months. Be sure to slice or shred it before freezing for easier use later.
- Recipes: Use leftover chicken for salads, sandwiches, or casseroles. It’s a great addition to soups or stir-fries as well.
Conclusion
Roasting chicken is a timeless technique that yields delicious results. With a little practice and the right recipes, you can create meals that impress your family and friends. Remember to choose quality ingredients, experiment with flavors, and enjoy the process of cooking. Whether you stick to traditional roasts or explore fun variations like beer can chicken, the joy of a perfectly roasted chicken is in your hands. Happy roasting!
FAQs
1. How long should I let the chicken rest after roasting?
It’s best to let the chicken rest for about 10-15 minutes before carving. This allows the juices to redistribute, resulting in moister meat.
2. Can I roast a frozen chicken?
It’s not recommended to roast a frozen chicken as it will not cook evenly. Always thaw it completely in the fridge before roasting.
3. What temperature should I roast chicken at?
The most common temperature is 375°F (190°C). This allows for even cooking and crispy skin.
4. Do I need to cover the chicken while roasting?
If you want the skin to remain golden and crispy, avoid covering it. If it starts to brown too quickly, you can loosely cover it with foil towards the end of cooking.
5. What is the best way to season a chicken?
A simple seasoning of salt, pepper, and herbs works wonders. However, feel free to experiment with marinades or spice blends for added flavor.
Task for AI:
Generate a unique, concise, and engaging post title based on the provided content.
Output Requirements:
✅ Keep the title within 10–15 words.
✅ Make it attention-grabbing and relevant to the content.
✅ Use persuasive or intriguing language to spark interest.
✅ Avoid generic or vague phrasing—make it stand out!
Please write in English language.
The Ultimate Guide to Roasting Chicken: Perfect Recipes for Dinner
https://hillrecipes.com/the-ultimate-guide-to-roasting-chicken-perfect-recipes-for-dinner/
Input:
Post Content:
In the fast-paced world we live in, lunch often becomes an afterthought. However, a good lunch can make all the difference in your productivity and energy levels throughout the afternoon. For those following a low-carb lifestyle, finding satisfying lunch options can seem overwhelming. The truth is, there are numerous delicious and filling low-carb meals that you can prepare quickly and easily.
Whether you're at home, at the office, or on the go, it’s essential to choose meals that not only fuel your body but also keep your carb intake in check. This article will explore various satisfying low-carb lunch ideas, recipes, and tips to help you stay energized and focused throughout the day.
The Importance of Low-Carb Lunches
Low-carb lunches are beneficial for various reasons:
- Stable Energy Levels: Foods low in carbs can help maintain stable blood sugar levels, preventing energy crashes.
- Weight Management: Lower carbohydrate intake can lead to weight loss and improved body composition.
- Increased Satiety: Low-carb meals often contain higher levels of protein and healthy fats, which help keep you fuller for longer.
- Enhanced Mental Focus: A low-carb diet can improve cognitive function and focus, essential for a productive afternoon at work or home.
Tips for Preparing Satisfying Low-Carb Lunches
Before diving into specific meal ideas and recipes, consider the following tips for preparing low-carb lunches:
- Plan Ahead: Meal prepping can save time and ensure you have healthy options ready to go. Try to designate a day each week for planning and preparing meals.
- Focus on Whole Foods: Choose whole foods like vegetables, lean proteins, and healthy fats rather than processed items, which often contain hidden sugars and carbs.
- Mix and Match: Create variety in your meals by mixing different proteins, vegetables, and healthy fats. This helps prevent boredom.
- Stay Hydrated: Don’t forget to drink plenty of water throughout the day, as hydration is key to maintaining energy levels.
Delicious Low-Carb Lunch Ideas
Here are some satisfying low-carb lunch options that are easy to prepare and delicious:
1. Zucchini Noodles with Pesto and Grilled Chicken
Zucchini noodles, or "zoodles," are a fantastic low-carb alternative to traditional pasta. Pairing them with a homemade pesto and grilled chicken makes for a nutritious and satisfying meal.
Ingredients:
- 2 medium zucchinis (spiralized)
- 1 cup grilled chicken breast, diced
- 1/2 cup homemade or store-bought pesto
- Salt and pepper to taste
Instructions:
- Heat a non-stick skillet over medium heat.
- Add the spiralized zucchini and sauté for 3-4 minutes until tender.
- Add the grilled chicken and pesto, stirring to combine and heat through.
- Season with salt and pepper, and serve immediately.
2. Avocado Tuna Salad
This dish is packed with healthy fats and protein, making it perfect for a filling lunch.
Ingredients:
- 1 can tuna, drained
- 1 ripe avocado, mashed
- 1 tbsp mayonnaise
- 1 tbsp lime juice
- Salt and pepper to taste
- Cherry tomatoes, halved (optional)
Instructions:
- In a bowl, combine tuna, mashed avocado, mayonnaise, and lime juice.
- Mix well and season with salt and pepper.
- Add cherry tomatoes if desired.
- Serve with cucumber slices or in lettuce wraps.
3. Egg Salad Lettuce Wraps
Swap out the bread for lettuce leaves with this creamy and delicious egg salad.
Ingredients:
- 4 hard-boiled eggs, chopped
- 2 tbsp mayonnaise
- 1 tsp Dijon mustard
- Salt and pepper to taste
- Butter lettuce leaves for wrapping
Instructions:
- In a mixing bowl, combine chopped eggs, mayonnaise, Dijon mustard, salt, and pepper.
- Mix until creamy and well-combined.
- Serve wrapped in butter lettuce leaves.
4. Stuffed Bell Peppers
These colorful bell peppers are loaded with nutritious ingredients and make for a filling lunch.
Ingredients:
- 2 bell peppers, halved and seeds removed
- 1 lb ground turkey or beef
- 1 cup cauliflower rice
- 1 tsp Italian seasoning
- 1/2 cup shredded cheese (optional)
Instructions:
- Preheat oven to 375°F (190°C).
- In a skillet, brown the ground meat and drain excess fat.
- Add cauliflower rice and Italian seasoning to the meat, cooking until heated through.
- Stuff the mixture into the halved bell peppers and top with cheese if desired.
- Bake for 25-30 minutes until the peppers are tender.
5. Greek Salad with Grilled Shrimp
A refreshing and light option, this salad is perfect for a warm afternoon.
Ingredients:
- 1 lb shrimp, peeled and deveined
- 2 cups mixed greens
- 1/2 cucumber, diced
- 1/2 red onion, sliced
- 1/2 cup feta cheese, crumbled
- Olive oil, lemon juice, salt, and pepper for dressing
Instructions:
- In a skillet, heat olive oil over medium-high heat. Add shrimp and cook for 2-3 minutes on each side until pink.
- In a bowl, toss mixed greens, cucumber, red onion, and feta cheese.
- Top the salad with grilled shrimp and drizzle with olive oil and lemon juice. Season with salt and pepper.
Creative Low-Carb Lunch Combinations
Sometimes, simple combinations can lead to satisfying meals. Here are some ideas for easy-to-pull-together low-carb lunches:
1. Cheese and Charcuterie Board
Gather a variety of cheeses, olives, nuts, and cured meats. This makes for a delightful, low-carb meal that can be enjoyed at home or packed for lunch on the go.
2. Hard-Boiled Eggs and Raw Veggies
Hard-boiled eggs are a great source of protein. Pair them with raw veggies like bell peppers, celery, and cherry tomatoes for a quick and easy lunch.
3. Cauliflower Pizza
Create a cauliflower crust and top it with your favorite low-carb toppings like mozzarella cheese, pepperoni, and vegetables for a filling and satisfying lunch.
4. Chicken Caesar Salad
Use romaine lettuce, grilled chicken, Parmesan cheese, and a homemade low-carb Caesar dressing for a classic favorite with a keto twist.
5. Veggie Omelette
Whisk up some eggs and toss in your favorite non-starchy vegetables like spinach, mushrooms, and bell peppers. Serve with avocado for added healthy fats.
How to Keep Lunches Interesting
Eating low-carb doesn’t have to be boring. Here are some strategies to keep your meals exciting:
- Experiment with Spices: Using different herbs and spices can change the flavor profile of a meal dramatically.
- Try New Ingredients: Don’t be afraid to explore new vegetables, proteins, and sauces that fit within your low-carb lifestyle.
- Makeshift Wraps: Use large leafy greens or low-carb tortillas to create wraps filled with your favorite fillings.
- Include Dips: Pair lunches with popular low-carb dips like guacamole, hummus, or tzatziki for extra flavor.
Conclusion
Finding satisfying low-carb lunches is easier than it seems. With a bit of planning and creativity, you can create meals that not only fit your nutritional needs but also keep your taste buds happy. From zucchini noodles and avocado tuna salad to charcuterie boards and egg salads, the options are endless. Remember to mix and match your ingredients, try new recipes, and focus on whole foods to truly embrace a low-carb lifestyle.
Incorporate these lunch ideas into your weekly meal prep and enjoy the benefits of steady energy levels and improved focus throughout your day. Happy lunching!
FAQs
1. Are low-carb lunches suitable for everyone?
While low-carb lunches can be beneficial for many people, especially those looking to manage their weight or blood sugar levels, it's essential to tailor your diet to your individual needs. Consult with a healthcare professional or a registered dietitian before making significant dietary changes.
2. How can I make my low-carb lunches more filling?
Incorporate sources of protein and healthy fats into your meals, such as lean meats, eggs, avocados, and nuts. Additionally, including non-starchy vegetables can add bulk and nutrients without significantly increasing carb counts.
3. Can I eat fruit on a low-carb lunch plan?
Yes, some fruits can be included in a low-carb diet. Opt for berries, which are lower in carbohydrates compared to other fruits, and enjoy them in moderation.
4. How do I store and meal prep low-carb lunches?
Use airtight containers to store your prepped meals in the refrigerator. Most cooked proteins and vegetables can last 3-5 days. Portion out individual meals for easy grab-and-go options.
5. What are some easy low-carb snacks I can pair with my lunch?
Some great low-carb snack options include cheese sticks, nuts, hard-boiled eggs, cucumber slices, and celery with cream cheese or nut butter.
It seems like your message got cut off. Could you please provide more details or clarify what you need help with? Whether it’s a specific topic, a question, or a creative prompt, I’m here to assist!, #Satisfying #LowCarb #Lunches #Fuel #Afternoon, #Satisfying #LowCarb #Lunches #Fuel #Afternoon, 1734825289, satisfying-low-carb-lunches-to-fuel-your-afternoon
Task for AI:
Generate a unique, concise, and engaging post title based on the provided content.
Output Requirements:
✅ Keep the title within 10–15 words.
✅ Make it attention-grabbing and relevant to the content.
✅ Use persuasive or intriguing language to spark interest.
✅ Avoid generic or vague phrasing—make it stand out!
Please write in English language.
FAQs
1. Are low-carb lunches suitable for everyone?
While low-carb lunches can be beneficial for many people, especially those looking to manage their weight or blood sugar levels, it's essential to tailor your diet to your individual needs. Consult with a healthcare professional or a registered dietitian before making significant dietary changes.
2. How can I make my low-carb lunches more filling?
Incorporate sources of protein and healthy fats into your meals, such as lean meats, eggs, avocados, and nuts. Additionally, including non-starchy vegetables can add bulk and nutrients without significantly increasing carb counts.
3. Can I eat fruit on a low-carb lunch plan?
Yes, some fruits can be included in a low-carb diet. Opt for berries, which are lower in carbohydrates compared to other fruits, and enjoy them in moderation.
4. How do I store and meal prep low-carb lunches?
Use airtight containers to store your prepped meals in the refrigerator. Most cooked proteins and vegetables can last 3-5 days. Portion out individual meals for easy grab-and-go options.
5. What are some easy low-carb snacks I can pair with my lunch?
Some great low-carb snack options include cheese sticks, nuts, hard-boiled eggs, cucumber slices, and celery with cream cheese or nut butter.
Input:
Post Content:
It seems like your message got cut off. Could you please provide more details or clarify what you need help with? Whether it’s a specific topic, a question, or a creative prompt, I’m here to assist!, #Satisfying #LowCarb #Lunches #Fuel #Afternoon, #Satisfying #LowCarb #Lunches #Fuel #Afternoon, 1734825289, satisfying-low-carb-lunches-to-fuel-your-afternoon
Task for AI:
Generate a unique, concise, and engaging post title based on the provided content.
Output Requirements:
✅ Keep the title within 10–15 words.
✅ Make it attention-grabbing and relevant to the content.
✅ Use persuasive or intriguing language to spark interest.
✅ Avoid generic or vague phrasing—make it stand out!
Please write in English language.
Satisfying Low-Carb Lunches to Fuel Your Afternoon
https://hillrecipes.com/satisfying-low-carb-lunches-to-fuel-your-afternoon/
Post Content:
In the fast-paced world we live in, lunch often becomes an afterthought. However, a good lunch can make all the difference in your productivity and energy levels throughout the afternoon. For those following a low-carb lifestyle, finding satisfying lunch options can seem overwhelming. The truth is, there are numerous delicious and filling low-carb meals that you can prepare quickly and easily.
Whether you're at home, at the office, or on the go, it’s essential to choose meals that not only fuel your body but also keep your carb intake in check. This article will explore various satisfying low-carb lunch ideas, recipes, and tips to help you stay energized and focused throughout the day.
The Importance of Low-Carb Lunches
Low-carb lunches are beneficial for various reasons:
- Stable Energy Levels: Foods low in carbs can help maintain stable blood sugar levels, preventing energy crashes.
- Weight Management: Lower carbohydrate intake can lead to weight loss and improved body composition.
- Increased Satiety: Low-carb meals often contain higher levels of protein and healthy fats, which help keep you fuller for longer.
- Enhanced Mental Focus: A low-carb diet can improve cognitive function and focus, essential for a productive afternoon at work or home.
Tips for Preparing Satisfying Low-Carb Lunches
Before diving into specific meal ideas and recipes, consider the following tips for preparing low-carb lunches:
- Plan Ahead: Meal prepping can save time and ensure you have healthy options ready to go. Try to designate a day each week for planning and preparing meals.
- Focus on Whole Foods: Choose whole foods like vegetables, lean proteins, and healthy fats rather than processed items, which often contain hidden sugars and carbs.
- Mix and Match: Create variety in your meals by mixing different proteins, vegetables, and healthy fats. This helps prevent boredom.
- Stay Hydrated: Don’t forget to drink plenty of water throughout the day, as hydration is key to maintaining energy levels.
Delicious Low-Carb Lunch Ideas
Here are some satisfying low-carb lunch options that are easy to prepare and delicious:
1. Zucchini Noodles with Pesto and Grilled Chicken
Zucchini noodles, or "zoodles," are a fantastic low-carb alternative to traditional pasta. Pairing them with a homemade pesto and grilled chicken makes for a nutritious and satisfying meal.
Ingredients:
- 2 medium zucchinis (spiralized)
- 1 cup grilled chicken breast, diced
- 1/2 cup homemade or store-bought pesto
- Salt and pepper to taste
Instructions:
- Heat a non-stick skillet over medium heat.
- Add the spiralized zucchini and sauté for 3-4 minutes until tender.
- Add the grilled chicken and pesto, stirring to combine and heat through.
- Season with salt and pepper, and serve immediately.
2. Avocado Tuna Salad
This dish is packed with healthy fats and protein, making it perfect for a filling lunch.
Ingredients:
- 1 can tuna, drained
- 1 ripe avocado, mashed
- 1 tbsp mayonnaise
- 1 tbsp lime juice
- Salt and pepper to taste
- Cherry tomatoes, halved (optional)
Instructions:
- In a bowl, combine tuna, mashed avocado, mayonnaise, and lime juice.
- Mix well and season with salt and pepper.
- Add cherry tomatoes if desired.
- Serve with cucumber slices or in lettuce wraps.
3. Egg Salad Lettuce Wraps
Swap out the bread for lettuce leaves with this creamy and delicious egg salad.
Ingredients:
- 4 hard-boiled eggs, chopped
- 2 tbsp mayonnaise
- 1 tsp Dijon mustard
- Salt and pepper to taste
- Butter lettuce leaves for wrapping
Instructions:
- In a mixing bowl, combine chopped eggs, mayonnaise, Dijon mustard, salt, and pepper.
- Mix until creamy and well-combined.
- Serve wrapped in butter lettuce leaves.
4. Stuffed Bell Peppers
These colorful bell peppers are loaded with nutritious ingredients and make for a filling lunch.
Ingredients:
- 2 bell peppers, halved and seeds removed
- 1 lb ground turkey or beef
- 1 cup cauliflower rice
- 1 tsp Italian seasoning
- 1/2 cup shredded cheese (optional)
Instructions:
- Preheat oven to 375°F (190°C).
- In a skillet, brown the ground meat and drain excess fat.
- Add cauliflower rice and Italian seasoning to the meat, cooking until heated through.
- Stuff the mixture into the halved bell peppers and top with cheese if desired.
- Bake for 25-30 minutes until the peppers are tender.
5. Greek Salad with Grilled Shrimp
A refreshing and light option, this salad is perfect for a warm afternoon.
Ingredients:
- 1 lb shrimp, peeled and deveined
- 2 cups mixed greens
- 1/2 cucumber, diced
- 1/2 red onion, sliced
- 1/2 cup feta cheese, crumbled
- Olive oil, lemon juice, salt, and pepper for dressing
Instructions:
- In a skillet, heat olive oil over medium-high heat. Add shrimp and cook for 2-3 minutes on each side until pink.
- In a bowl, toss mixed greens, cucumber, red onion, and feta cheese.
- Top the salad with grilled shrimp and drizzle with olive oil and lemon juice. Season with salt and pepper.
Creative Low-Carb Lunch Combinations
Sometimes, simple combinations can lead to satisfying meals. Here are some ideas for easy-to-pull-together low-carb lunches:
1. Cheese and Charcuterie Board
Gather a variety of cheeses, olives, nuts, and cured meats. This makes for a delightful, low-carb meal that can be enjoyed at home or packed for lunch on the go.
2. Hard-Boiled Eggs and Raw Veggies
Hard-boiled eggs are a great source of protein. Pair them with raw veggies like bell peppers, celery, and cherry tomatoes for a quick and easy lunch.
3. Cauliflower Pizza
Create a cauliflower crust and top it with your favorite low-carb toppings like mozzarella cheese, pepperoni, and vegetables for a filling and satisfying lunch.
4. Chicken Caesar Salad
Use romaine lettuce, grilled chicken, Parmesan cheese, and a homemade low-carb Caesar dressing for a classic favorite with a keto twist.
5. Veggie Omelette
Whisk up some eggs and toss in your favorite non-starchy vegetables like spinach, mushrooms, and bell peppers. Serve with avocado for added healthy fats.
How to Keep Lunches Interesting
Eating low-carb doesn’t have to be boring. Here are some strategies to keep your meals exciting:
- Experiment with Spices: Using different herbs and spices can change the flavor profile of a meal dramatically.
- Try New Ingredients: Don’t be afraid to explore new vegetables, proteins, and sauces that fit within your low-carb lifestyle.
- Makeshift Wraps: Use large leafy greens or low-carb tortillas to create wraps filled with your favorite fillings.
- Include Dips: Pair lunches with popular low-carb dips like guacamole, hummus, or tzatziki for extra flavor.
Conclusion
Finding satisfying low-carb lunches is easier than it seems. With a bit of planning and creativity, you can create meals that not only fit your nutritional needs but also keep your taste buds happy. From zucchini noodles and avocado tuna salad to charcuterie boards and egg salads, the options are endless. Remember to mix and match your ingredients, try new recipes, and focus on whole foods to truly embrace a low-carb lifestyle.
Incorporate these lunch ideas into your weekly meal prep and enjoy the benefits of steady energy levels and improved focus throughout your day. Happy lunching!
FAQs
1. Are low-carb lunches suitable for everyone?
While low-carb lunches can be beneficial for many people, especially those looking to manage their weight or blood sugar levels, it's essential to tailor your diet to your individual needs. Consult with a healthcare professional or a registered dietitian before making significant dietary changes.
2. How can I make my low-carb lunches more filling?
Incorporate sources of protein and healthy fats into your meals, such as lean meats, eggs, avocados, and nuts. Additionally, including non-starchy vegetables can add bulk and nutrients without significantly increasing carb counts.
3. Can I eat fruit on a low-carb lunch plan?
Yes, some fruits can be included in a low-carb diet. Opt for berries, which are lower in carbohydrates compared to other fruits, and enjoy them in moderation.
4. How do I store and meal prep low-carb lunches?
Use airtight containers to store your prepped meals in the refrigerator. Most cooked proteins and vegetables can last 3-5 days. Portion out individual meals for easy grab-and-go options.
5. What are some easy low-carb snacks I can pair with my lunch?
Some great low-carb snack options include cheese sticks, nuts, hard-boiled eggs, cucumber slices, and celery with cream cheese or nut butter.
It seems like your message got cut off. Could you please provide more details or clarify what you need help with? Whether it’s a specific topic, a question, or a creative prompt, I’m here to assist!, #Satisfying #LowCarb #Lunches #Fuel #Afternoon, #Satisfying #LowCarb #Lunches #Fuel #Afternoon, 1734825289, satisfying-low-carb-lunches-to-fuel-your-afternoon
Task for AI:
Generate a unique, concise, and engaging post title based on the provided content.
Output Requirements:
✅ Keep the title within 10–15 words.
✅ Make it attention-grabbing and relevant to the content.
✅ Use persuasive or intriguing language to spark interest.
✅ Avoid generic or vague phrasing—make it stand out!
Please write in English language.
Satisfying Low-Carb Lunches to Fuel Your Afternoon
https://hillrecipes.com/satisfying-low-carb-lunches-to-fuel-your-afternoon/
Input:
Post Content:
When the weather turns cold or when we find ourselves in need of a little emotional uplift, there’s nothing quite like comfort food to warm our hearts and nourish our souls. For those following a vegetarian lifestyle, comfort food can take on many delicious forms. In this guide, we will explore the world of vegetarian comfort food, delving into recipes, ingredients, and cooking techniques that bring joy to the dining table.
What is Comfort Food?
Comfort food is often defined as dishes that provide sentimental value or nostalgia, typically associated with home-cooked meals. These foods are usually rich in flavor, hearty, and satisfying, aiming to provide not just nourishment but also emotional comfort. Vegetarian comfort food can include a variety of dishes, from creamy pastas to hearty stews and soul-warming baked goods.
Key Ingredients in Vegetarian Comfort Food
Vegetarian comfort food relies heavily on a selection of wholesome ingredients that are both flavorful and fulfilling. Here are some essential ingredients commonly found in these dishes:
- Legumes: Beans, lentils, and chickpeas add protein and texture.
- Whole Grains: Brown rice, quinoa, barley, and whole wheat pasta provide fiber and substance.
- Seasonal Vegetables: Root vegetables like potatoes, carrots, and squash are perfect for hearty meals.
- Dairy Alternatives: From almond milk to cashew cream, dairy substitutes add richness.
- Herbs and Spices: Fresh herbs like basil, cilantro, and spices add depth of flavor.
Popular Vegetarian Comfort Food Dishes
1. Creamy Vegan Mushroom Risotto
This comforting dish is rich and creamy, thanks to the unique texture of Arborio rice. The earthy flavors of mushrooms blend beautifully with vegetable broth and a hint of white wine.
Ingredients:
- 1 cup Arborio rice
- 4 cups vegetable broth
- 1 cup mushrooms, sliced
- 1 onion, finely chopped
- 2 cloves garlic, minced
- 1/2 cup white wine (optional)
- 2 tablespoons nutritional yeast
- Salt and pepper to taste
- Fresh parsley for garnish
Instructions:
- In a saucepan, heat the vegetable broth and keep it warm.
- In a large skillet, sauté onions and garlic until translucent.
- Add mushrooms and cook until browned.
- Stir in the Arborio rice and cook for a couple of minutes.
- If using, add white wine and cook until absorbed.
- Add warm vegetable broth, one ladle at a time, stirring constantly until absorbed before adding more.
- Once the rice is creamy and al dente, stir in nutritional yeast, salt, and pepper.
- Garnish with parsley and serve hot.
2. Hearty Vegetable Lentil Soup
This nourishing soup is packed with protein and fiber, making it a perfect meal for any day. Its warming spices and variety of vegetables create a satisfying blend.
Ingredients:
- 1 cup lentils, rinsed
- 1 onion, chopped
- 2 carrots, diced
- 2 celery stalks, diced
- 3 cloves garlic, minced
- 1 can diced tomatoes
- 4 cups vegetable broth
- 1 teaspoon cumin
- 1 teaspoon paprika
- Salt and pepper to taste
Instructions:
- In a large pot, sauté onions, carrots, and celery until softened.
- Add garlic, cumin, and paprika, stirring until fragrant.
- Stir in lentils, diced tomatoes, and vegetable broth. Bring to a boil.
- Reduce heat and simmer for 30-40 minutes or until lentils are tender.
- Season with salt and pepper. Serve warm.
3. Classic Vegetarian Mac and Cheese
This indulgent dish is comfort food at its finest. With a creamy cheese sauce and tender macaroni, it’s perfect for any evening.
Ingredients:
- 8 oz elbow macaroni
- 2 cups shredded cheese (cheddar or vegan alternative)
- 2 tablespoons flour
- 2 tablespoons butter or margarine
- 2 cups milk or non-dairy milk
- Salt and pepper to taste
Instructions:
- Cook macaroni according to package instructions.
- In a separate pot, melt butter and whisk in flour to form a roux.
- Gradually add milk, stirring until thickened.
- Stir in cheese until melted and smooth.
- Combine the cheese sauce with the macaroni. Season and serve hot.
Making Comfort Food Healthier
While comfort food is often rich and indulgent, it can be made healthier with a few simple swaps:
- Use Whole Grains: Opt for whole grain pasta and brown rice instead of white varieties.
- Add More Vegetables: Increase the vegetable content in dishes to boost fiber and nutrients.
- Reduce Dairy: Use plant-based milks and creams to cut down on saturated fats.
- Healthy Fats: Replace butter with olive oil or avocado oil.
Cooking Techniques for Comfort Food
Comfort food can be prepared through various methods, each providing a unique flavor and texture profile:
- Simmering: Ideal for soups and stews, allowing flavors to meld and deepen over time.
- Baking: Perfect for casseroles and baked goods, leading to golden, crispy edges.
- Sautéing: Quick cooking method for vegetables and proteins, keeping them vibrant and tasty.
- Slow Cooking: Great for tenderizing ingredients; ideal for busy days with minimal effort.
Conclusion
Vegetarian comfort food encompasses a wide variety of dishes, all designed to bring warmth and satisfaction to your meals. It’s about nourishing your body while also soothing your soul. With the right ingredients, cooking techniques, and recipes, anyone can create delicious vegetarian comfort food that feels like a warm hug on a plate. So the next time you're in need of comfort, turn to these nourishing meals that speak to the heart and palate alike.
FAQs
1. Is comfort food unhealthy?
Not necessarily! While many traditional comfort foods can be high in calories and fats, they can be modified to incorporate healthier ingredients without compromising on taste.
2. Can I make comfort food vegan?
Absolutely! Many comfort food recipes can easily be adapted to be plant-based by substituting dairy ingredients with plant-based alternatives.
3. How can I add more flavor to my vegetarian comfort food?
Use a variety of herbs, spices, and aromatics like garlic and onion. Adding elements like nutritional yeast or smoked paprika can also enhance flavors significantly.
4. What are some easy vegetarian comfort food options for beginners?
Simple options include vegetable stir-fry, baked potatoes with toppings, or a basic vegetable soup. These dishes require minimal ingredients and are easy to prepare.
5. Can comfort food be made in advance?
Yes! Many comfort food dishes, like casseroles and soups, can be made in advance and stored in the fridge or freezer for easy reheating later.
It seems like you might be looking for a writing prompt or a specific type of prompt. Can you please provide more details about what you're looking for? This could pertain to creative writing, a discussion topic, or something else entirely. Let me know how I can assist you!, #Ultimate #Guide #Delicious #Vegetarian #Comfort #Food, #Ultimate #Guide #Delicious #Vegetarian #Comfort #Food, 1735383739, the-ultimate-guide-to-delicious-vegetarian-comfort-food
Task for AI:
Generate a unique, concise, and engaging post title based on the provided content.
Output Requirements:
✅ Keep the title within 10–15 words.
✅ Make it attention-grabbing and relevant to the content.
✅ Use persuasive or intriguing language to spark interest.
✅ Avoid generic or vague phrasing—make it stand out!
Please write in English language.
Input:
Post Content:
It seems like you might be looking for a writing prompt or a specific type of prompt. Can you please provide more details about what you're looking for? This could pertain to creative writing, a discussion topic, or something else entirely. Let me know how I can assist you!, #Ultimate #Guide #Delicious #Vegetarian #Comfort #Food, #Ultimate #Guide #Delicious #Vegetarian #Comfort #Food, 1735383739, the-ultimate-guide-to-delicious-vegetarian-comfort-food
Task for AI:
Generate a unique, concise, and engaging post title based on the provided content.
Output Requirements:
✅ Keep the title within 10–15 words.
✅ Make it attention-grabbing and relevant to the content.
✅ Use persuasive or intriguing language to spark interest.
✅ Avoid generic or vague phrasing—make it stand out!
Please write in English language.
The Ultimate Guide to Delicious Vegetarian Comfort Food
https://hillrecipes.com/the-ultimate-guide-to-delicious-vegetarian-comfort-food/
Post Content:
When the weather turns cold or when we find ourselves in need of a little emotional uplift, there’s nothing quite like comfort food to warm our hearts and nourish our souls. For those following a vegetarian lifestyle, comfort food can take on many delicious forms. In this guide, we will explore the world of vegetarian comfort food, delving into recipes, ingredients, and cooking techniques that bring joy to the dining table.
What is Comfort Food?
Comfort food is often defined as dishes that provide sentimental value or nostalgia, typically associated with home-cooked meals. These foods are usually rich in flavor, hearty, and satisfying, aiming to provide not just nourishment but also emotional comfort. Vegetarian comfort food can include a variety of dishes, from creamy pastas to hearty stews and soul-warming baked goods.
Key Ingredients in Vegetarian Comfort Food
Vegetarian comfort food relies heavily on a selection of wholesome ingredients that are both flavorful and fulfilling. Here are some essential ingredients commonly found in these dishes:
- Legumes: Beans, lentils, and chickpeas add protein and texture.
- Whole Grains: Brown rice, quinoa, barley, and whole wheat pasta provide fiber and substance.
- Seasonal Vegetables: Root vegetables like potatoes, carrots, and squash are perfect for hearty meals.
- Dairy Alternatives: From almond milk to cashew cream, dairy substitutes add richness.
- Herbs and Spices: Fresh herbs like basil, cilantro, and spices add depth of flavor.
Popular Vegetarian Comfort Food Dishes
1. Creamy Vegan Mushroom Risotto
This comforting dish is rich and creamy, thanks to the unique texture of Arborio rice. The earthy flavors of mushrooms blend beautifully with vegetable broth and a hint of white wine.
Ingredients:
- 1 cup Arborio rice
- 4 cups vegetable broth
- 1 cup mushrooms, sliced
- 1 onion, finely chopped
- 2 cloves garlic, minced
- 1/2 cup white wine (optional)
- 2 tablespoons nutritional yeast
- Salt and pepper to taste
- Fresh parsley for garnish
Instructions:
- In a saucepan, heat the vegetable broth and keep it warm.
- In a large skillet, sauté onions and garlic until translucent.
- Add mushrooms and cook until browned.
- Stir in the Arborio rice and cook for a couple of minutes.
- If using, add white wine and cook until absorbed.
- Add warm vegetable broth, one ladle at a time, stirring constantly until absorbed before adding more.
- Once the rice is creamy and al dente, stir in nutritional yeast, salt, and pepper.
- Garnish with parsley and serve hot.
2. Hearty Vegetable Lentil Soup
This nourishing soup is packed with protein and fiber, making it a perfect meal for any day. Its warming spices and variety of vegetables create a satisfying blend.
Ingredients:
- 1 cup lentils, rinsed
- 1 onion, chopped
- 2 carrots, diced
- 2 celery stalks, diced
- 3 cloves garlic, minced
- 1 can diced tomatoes
- 4 cups vegetable broth
- 1 teaspoon cumin
- 1 teaspoon paprika
- Salt and pepper to taste
Instructions:
- In a large pot, sauté onions, carrots, and celery until softened.
- Add garlic, cumin, and paprika, stirring until fragrant.
- Stir in lentils, diced tomatoes, and vegetable broth. Bring to a boil.
- Reduce heat and simmer for 30-40 minutes or until lentils are tender.
- Season with salt and pepper. Serve warm.
3. Classic Vegetarian Mac and Cheese
This indulgent dish is comfort food at its finest. With a creamy cheese sauce and tender macaroni, it’s perfect for any evening.
Ingredients:
- 8 oz elbow macaroni
- 2 cups shredded cheese (cheddar or vegan alternative)
- 2 tablespoons flour
- 2 tablespoons butter or margarine
- 2 cups milk or non-dairy milk
- Salt and pepper to taste
Instructions:
- Cook macaroni according to package instructions.
- In a separate pot, melt butter and whisk in flour to form a roux.
- Gradually add milk, stirring until thickened.
- Stir in cheese until melted and smooth.
- Combine the cheese sauce with the macaroni. Season and serve hot.
Making Comfort Food Healthier
While comfort food is often rich and indulgent, it can be made healthier with a few simple swaps:
- Use Whole Grains: Opt for whole grain pasta and brown rice instead of white varieties.
- Add More Vegetables: Increase the vegetable content in dishes to boost fiber and nutrients.
- Reduce Dairy: Use plant-based milks and creams to cut down on saturated fats.
- Healthy Fats: Replace butter with olive oil or avocado oil.
Cooking Techniques for Comfort Food
Comfort food can be prepared through various methods, each providing a unique flavor and texture profile:
- Simmering: Ideal for soups and stews, allowing flavors to meld and deepen over time.
- Baking: Perfect for casseroles and baked goods, leading to golden, crispy edges.
- Sautéing: Quick cooking method for vegetables and proteins, keeping them vibrant and tasty.
- Slow Cooking: Great for tenderizing ingredients; ideal for busy days with minimal effort.
Conclusion
Vegetarian comfort food encompasses a wide variety of dishes, all designed to bring warmth and satisfaction to your meals. It’s about nourishing your body while also soothing your soul. With the right ingredients, cooking techniques, and recipes, anyone can create delicious vegetarian comfort food that feels like a warm hug on a plate. So the next time you're in need of comfort, turn to these nourishing meals that speak to the heart and palate alike.
FAQs
1. Is comfort food unhealthy?
Not necessarily! While many traditional comfort foods can be high in calories and fats, they can be modified to incorporate healthier ingredients without compromising on taste.
2. Can I make comfort food vegan?
Absolutely! Many comfort food recipes can easily be adapted to be plant-based by substituting dairy ingredients with plant-based alternatives.
3. How can I add more flavor to my vegetarian comfort food?
Use a variety of herbs, spices, and aromatics like garlic and onion. Adding elements like nutritional yeast or smoked paprika can also enhance flavors significantly.
4. What are some easy vegetarian comfort food options for beginners?
Simple options include vegetable stir-fry, baked potatoes with toppings, or a basic vegetable soup. These dishes require minimal ingredients and are easy to prepare.
5. Can comfort food be made in advance?
Yes! Many comfort food dishes, like casseroles and soups, can be made in advance and stored in the fridge or freezer for easy reheating later.
It seems like you might be looking for a writing prompt or a specific type of prompt. Can you please provide more details about what you're looking for? This could pertain to creative writing, a discussion topic, or something else entirely. Let me know how I can assist you!, #Ultimate #Guide #Delicious #Vegetarian #Comfort #Food, #Ultimate #Guide #Delicious #Vegetarian #Comfort #Food, 1735383739, the-ultimate-guide-to-delicious-vegetarian-comfort-food
Task for AI:
Generate a unique, concise, and engaging post title based on the provided content.
Output Requirements:
✅ Keep the title within 10–15 words.
✅ Make it attention-grabbing and relevant to the content.
✅ Use persuasive or intriguing language to spark interest.
✅ Avoid generic or vague phrasing—make it stand out!
Please write in English language.
The Ultimate Guide to Delicious Vegetarian Comfort Food
https://hillrecipes.com/the-ultimate-guide-to-delicious-vegetarian-comfort-food/
Revitalize Your Mornings: 12 Quick and Delicious Breakfasts for Busy Lives
Revitalize Your Mornings: 12 Quick and Delicious Breakfasts for Busy Lives
# Savory Herb-Infused Chicken Thighs
If you're looking for a delicious, comforting dish to impress your friends and family, these savory herb-infused chicken thighs are just the ticket! Bursting with flavor and perfect for any occasion, this recipe takes simple ingredients and transforms them into a mouthwatering masterpiece. Grab your apron and let’s get cooking!
### Ingredients:
- 4 bone-in, skin-on chicken thighs
- 2 tablespoons olive oil
- 4 cloves garlic, minced
- 1 tablespoon fresh rosemary, chopped (or 1 teaspoon dried)
- 1 tablespoon fresh thyme, chopped (or 1 teaspoon dried)
- 1 teaspoon smoked paprika
- Salt and pepper to taste
- 1 cup vegetable broth (low-sodium)
- 1 tablespoon apple cider vinegar
- Fresh parsley, chopped, for garnish
- Lemon wedges, for serving
### Instructions:
1. **Prep the Chicken**: Start by patting the chicken thighs dry with paper towels. This step helps ensure crispy skin later on. Season both sides generously with salt and pepper.
2. **Sizzle and Sear**: In a large skillet, heat the olive oil over medium-high heat. Once hot, place the chicken thighs skin-side down into the pan. Sear them for about 5-7 minutes, or until the skin is golden brown and crispy. Don’t rush this step; that beautiful crust is key to flavor!
3. **Flip and Add Flavor**: Carefully flip the chicken thighs over and reduce the heat to medium. Add the minced garlic, rosemary, thyme, and smoked paprika to the skillet. Stir the herbs around the chicken to release their fragrant aromas, cooking them together for another 1-2 minutes.
4. **Add Broth and Acid**: Pour the vegetable broth into the skillet, followed by the apple cider vinegar. This liquid gold will help keep the chicken moist while infusing it with deep flavors. Bring the mixture to a gentle simmer.
5. **Cook Through**: Cover the skillet with a lid and let the chicken cook for about 25-30 minutes, or until the internal temperature reaches 165°F. The steam will tenderize the chicken, making it juicy and delightful.
6. **Final Touch**: Remove the lid and let the chicken simmer in the sauce for an additional 5 minutes. This allows the sauce to reduce a bit, creating a beautifully rich flavor.
7. **Serve and Enjoy**: Transfer the chicken thighs to a serving platter and spoon the pan sauce over the top. Sprinkle with freshly chopped parsley for a burst of color and flavor. Serve with lemon wedges on the side for an extra zing.
Gather your loved ones around the table and get ready to savor every bite of these herb-infused chicken thighs. They’re sure to become a new favorite in your recipe repertoire! Enjoy!
https://hillrecipes.com/quick-and-easy-breakfast-ideas-for-busy-mornings/
Whip Up a Creamy, One-Pot Mushroom Herb Risotto Masterpiece Tonight!
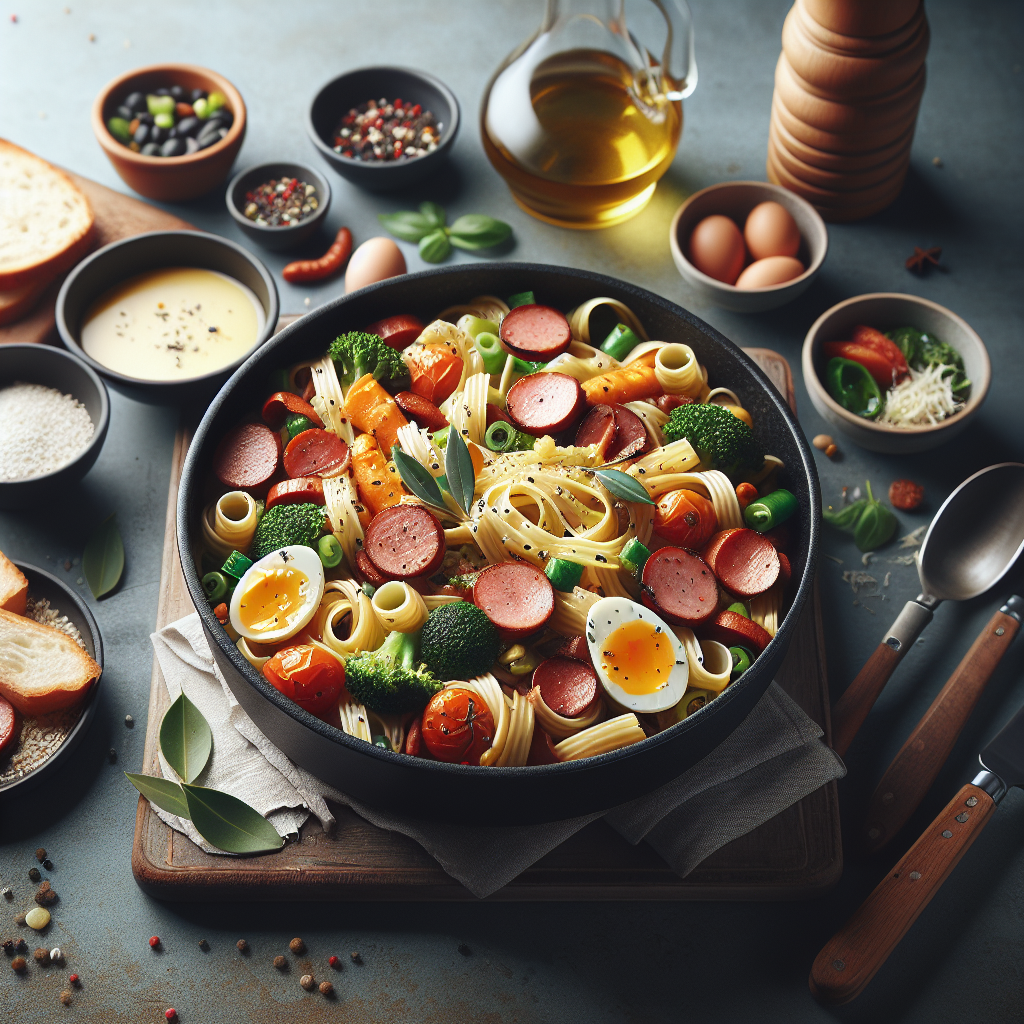
Hearty and Flavorful Mushroom and Herb Risotto: A One-Pot Wonder
When time is tight, but you're craving a meal that doesn’t skimp on flavor, this Mushroom and Herb Risotto is your go-to dish. It brings together the earthy flavors of mushrooms and the freshness of herbs in a creamy, comforting bowl that can be prepared all in one pot. Perfect for busy weeknights and sure to impress your family or guests, this risotto is simple to make and delivers that satisfying taste that you'll want to make over and over.
Ingredients
- 1 tablespoon olive oil
- 1 tablespoon unsalted butter
- 1 medium onion, finely diced
- 2 garlic cloves, minced
- 1 cup Arborio rice
- 4 cups vegetable broth, warmed
- 1 cup sliced mushrooms (such as cremini, shiitake, or button)
- 1 teaspoon dried thyme (or 2 teaspoons fresh thyme, chopped)
- Salt and freshly ground pepper, to taste
- 3/4 cup grated Parmesan cheese (or nutritional yeast for a vegan option)
- 2 tablespoons fresh parsley, chopped (for garnish)
- Optional: 1/4 cup cream or plant-based milk (for extra creaminess)
Instructions
Sauté the Aromatics: In a large pot, heat the olive oil and butter over medium heat until melted and shimmering. Add the diced onion and garlic, stirring occasionally for about 3-5 minutes, or until the onion is translucent and fragrant.
Toast the Rice: Add the Arborio rice to the pot and stir for about 1-2 minutes. This step helps to toast the rice, enhancing its nutty flavor and preparing it to absorb liquid beautifully.
Introduce the Broth: Slowly pour in the warmed vegetable broth, one ladle at a time, while stirring gently. Allow the rice to absorb the broth completely before adding the next ladle. This gradual process is key to achieving the perfect creamy texture that risotto is known for.
Add the Mushrooms and Herbs: After about 10 minutes of cooking and stirring, add the sliced mushrooms and thyme to the pot. Continue to cook, stirring often, as the mushrooms wilt and the risotto becomes thicker. This usually takes an additional 10-15 minutes.
Season and Finish: Once the rice is tender and the risotto is creamy, remove it from heat. Stir in the grated Parmesan cheese (or nutritional yeast) for richness, and season with salt and pepper to taste. For an over-the-top creamy texture, drizzle in the optional cream or plant-based milk.
- Garnish and Serve: Serve the risotto hot, garnished with fresh parsley for a touch of color and added freshness. Enjoy this delightful one-pot meal with a side salad or some crusty bread.
Conclusion
This Mushroom and Herb Risotto is not just a meal; it's a warm hug in a bowl, and it only takes your efforts in one pot. Perfect for busy weeknights when you want something quick yet comforting, this dish can easily impress your loved ones. The best part? You can customize it by adding your favorite seasonal vegetables or changing up the herbs according to your taste preferences.
FAQs
Can I make this risotto in advance?
While risotto is best enjoyed fresh, you can make it ahead and store it in the refrigerator for up to 2 days. Reheat gently on the stove, adding a splash of vegetable broth to restore its creamy texture.
What can I substitute for Arborio rice?
While Arborio rice is ideal for its creamy results, you can also use other short-grain rice varieties, such as Carnaroli or Vialone Nano. If you're looking for a lower-carb option, cauliflower rice can also be used, but it will require different cooking techniques.
Can I add other vegetables?
Absolutely! Asparagus, peas, spinach, or zucchini are excellent additions to risotto. If using fresh vegetables, add them during the last 5 minutes of cooking to maintain their vibrant color and texture.
Is there a vegan version?
Yes! Simply replace the butter with additional olive oil, the Parmesan cheese with nutritional yeast or a vegan cheese alternative, and use plant-based cream or milk for added richness.
How can I make this dish spicier?
Add a pinch of red pepper flakes during the cooking process or stir in some fresh chili when sautéing the onions to give the risotto a kick.
With this Mushroom and Herb Risotto as part of your cooking repertoire, you'll find that even the busiest of weeknights can have a delicious and satisfying dining experience. So gather your ingredients, pick out your favorite herbs, and let this one-pot wonder bring warmth to your table!
https://hillrecipes.com/one-pot-wonders-quick-and-easy-meals-for-busy-weeknights/?fsp_sid=2348
10 Flavor-Packed Dinner Recipes to Simplify Your Busy Weeknights
10 Flavor-Packed Dinner Recipes to Simplify Your Busy Weeknights
### Savory Mushroom and Herb Risotto
Whether you’re searching for a cozy weeknight dinner or planning an impressive feast for friends, this Savory Mushroom and Herb Risotto is here to elevate your culinary game. Creamy, rich, and bursting with flavor, this dish is a celebration of earthy mushrooms and fragrant herbs that come together to create a risotto that delights the senses. The best part? It’s more straightforward than you might think! Let’s dive in and transform your kitchen into a haven of comfort food.
#### Ingredients:
- 1 ½ cups Arborio rice
- 4 cups vegetable broth, warmed
- 1 cup mushrooms, sliced (such as cremini or button)
- 1 small onion, finely chopped
- 2 cloves garlic, minced
- 1 cup of low-sodium vegetable juice (as a substitute for wine)
- 2 tablespoons olive oil
- 1 tablespoon fresh thyme leaves, chopped (or 1 teaspoon dried thyme)
- 1 tablespoon fresh parsley, chopped
- 2 tablespoons nutritional yeast (for a cheesy flavor)
- Salt and black pepper to taste
- Optional: Fresh herbs for garnish
#### Instructions:
1. **Prepare Your Broth**: In a saucepan over medium heat, warm the vegetable broth until it is simmering. Keep it on low to stay warm throughout the cooking process, as adding cold broth will slow down the risotto’s cooking time.
2. **Sauté the Aromatics**: In a large, heavy-bottomed pot or skillet, heat the olive oil over medium heat. Add the finely chopped onion and sauté until it's translucent and fragrant, about 3-4 minutes. Then stir in the minced garlic and sauté for an additional minute until fragrant.
3. **Cook the Mushrooms**: Toss the sliced mushrooms into the pot and cook them until they are browned and tender, about 5 minutes. Let the mushrooms soak up the flavors of the aromatics.
4. **Toast the Rice**: Stir in the Arborio rice and toast it for about 2 minutes, ensuring it absorbs all the wonderful flavors from the pan. You want to achieve a slightly translucent appearance at the edges of the rice.
5. **Deglaze with Vegetable Juice**: Pour in the vegetable juice, scraping any browned bits from the bottom of the pan. Stir continuously until the liquid has mostly absorbed. This step will add a depth of flavor to your risotto.
6. **Add the Broth Gradually**: Start adding the warm vegetable broth one ladle at a time. Stir often and allow the rice to absorb most of the liquid before adding more. This process will take about 18-20 minutes. The risotto should be creamy and the rice tender, yet still slightly al dente.
7. **Season and Finish**: Once the rice is fully cooked and creamy, stir in the fresh thyme, parsley, and nutritional yeast. Add salt and black pepper to taste, adjusting as needed to achieve your desired flavor.
8. **Serve and Enjoy**: Spoon the risotto into bowls or onto plates, garnished with additional fresh herbs if you fancy. Enjoy this dish warm, savoring every delectable bite!
Transform your dining experience with this delightful mushroom risotto that’s not only easy to make but also packed with flavor and comfort. Perfect for any occasion, it’s bound to impress!
https://hillrecipes.com/10-delicious-and-easy-dinner-recipes-for-busy-weeknights/
10 Delicious 30-Minute Dinners to Transform Your Busy Weeknights
10 Delicious 30-Minute Dinners to Transform Your Busy Weeknights
**Savory Herb-Infused Chicken with Mushrooms**
If you’re looking for a comforting dish that brings the warmth of home-cooked meals right to your kitchen, this Savory Herb-Infused Chicken with Mushrooms is the answer! Perfect for a family gathering or a cozy evening in, this recipe features succulent chicken cooked to perfection with aromatic herbs and a medley of vibrant mushrooms. Each bite is a delightful symphony of flavors, making it both hearty and satisfying.
**Ingredients:**
- 4 boneless, skinless chicken thighs
- 2 cups assorted mushrooms (like cremini and shiitake), sliced
- 1 medium onion, diced
- 3 cloves garlic, minced
- 1 teaspoon dried thyme
- 1 teaspoon dried rosemary
- 1/2 teaspoon paprika
- Salt and pepper, to taste
- 1 cup low-sodium vegetable broth
- 1 tablespoon olive oil
- Fresh parsley, chopped (for garnish)
**Instructions:**
1. **Prepare the Chicken:** Start by seasoning the chicken thighs generously with salt, pepper, paprika, and half of the thyme and rosemary. This will enhance the flavors right from the start.
2. **Heat the Pan:** In a large skillet, heat the olive oil over medium heat. Once hot, add the seasoned chicken thighs to the pan. Cook for about 6-7 minutes on each side, or until they are golden brown and cooked through. Remove the chicken from the skillet and set it aside on a plate.
3. **Sauté the Vegetables:** In the same skillet, add the diced onion and sauté for 2-3 minutes until it becomes translucent. Stir in the minced garlic, cooking for an additional minute until fragrant.
4. **Mushroom Magic:** Next, add the sliced mushrooms to the skillet. Cook them for about 5-7 minutes, allowing them to become tender and release their moisture. They will soak up all the savory flavors from the pan!
5. **Create the Sauce:** Once the mushrooms are cooked, return the chicken to the skillet. Mix in the remaining thyme and rosemary, then pour in the vegetable broth. Bring the mixture to a simmer, allowing it to cook for another 5-10 minutes. This will infuse the chicken with delicious herbaceous goodness.
6. **Finish It Up:** After simmering, taste the sauce and adjust the seasoning if necessary. If you prefer a thicker sauce, let it cook for a bit longer until it reduces to your desired consistency.
7. **Serve and Garnish:** Plate your savory chicken and mushroom medley, and sprinkle with fresh chopped parsley for a pop of color and a burst of freshness.
This dish pairs beautifully with a side of creamy mashed potatoes or a simple green salad. Enjoy your fulfilling meal that’s bursting with flavors and comfort!
https://hillrecipes.com/30-minute-meals-quick-family-recipes-for-busy-weeknights/
Title: "Crave Less, Enjoy More: 20 Mouthwatering Low-Calorie Recipes to Satisfy Your Tastes
Title: "Crave Less, Enjoy More: 20 Mouthwatering Low-Calorie Recipes to Satisfy Your Tastes
### Savory Herb-Infused Chicken with Mushroom Sauce
Looking for a dish that combines rich flavors and is delightfully easy to prepare? Look no further! This Savory Herb-Infused Chicken with Mushroom Sauce is a perfect choice for a weeknight dinner or an impressive meal for guests. The succulent chicken, paired with a savory mushroom sauce, creates a satisfying plate that will tempt even the pickiest of eaters. Let’s dive into the deliciousness!
#### Ingredients:
- 4 boneless, skinless chicken breasts
- Salt and pepper, to taste
- 2 tablespoons olive oil
- 1 medium onion, finely chopped
- 3 cloves garlic, minced
- 8 ounces mushrooms, sliced (any variety you prefer)
- 1 cup chicken broth
- 1 tablespoon Worcestershire sauce
- 1 teaspoon dried thyme
- 1 teaspoon dried rosemary
- 1 tablespoon fresh parsley, chopped (for garnish)
- Optional: 1 cup heavy cream or plant-based cream for a richer sauce
#### Instructions:
1. **Prep the Chicken**: Start by patting your chicken breasts dry with paper towels. Season each piece generously with salt and pepper on both sides. This step is key to ensuring each bite is flavorful.
2. **Sear the Chicken**: In a large skillet, heat the olive oil over medium-high heat. Once the oil is shimmering, carefully add the chicken breasts to the pan. Sear them for about 6-7 minutes on one side until they are nicely browned. Flip the chicken over and cook for another 6-7 minutes, or until they reach an internal temperature of 165°F (75°C). Once cooked, remove the chicken from the skillet and set aside on a plate.
3. **Create the Sauce**: In the same skillet, add the chopped onion and sauté until translucent, about 3-4 minutes. Toss in the minced garlic and stir for another minute until fragrant. Stir in the sliced mushrooms and cook until they are browned and softened, about 5 minutes.
4. **Build Flavor**: Pour in the chicken broth and Worcestershire sauce, scraping any delicious browned bits from the bottom of the skillet. Stir in the dried thyme and rosemary. If you’re adding cream, pour it in now and mix until everything is well-combined. Let the sauce simmer gently for about 5 minutes to thicken and meld the flavors together.
5. **Combine Chicken and Sauce**: Return the seared chicken to the skillet, nestling them into the mushroom sauce. Allow the chicken to simmer for an additional 5-10 minutes, ensuring it absorbs the wonderful flavors of the sauce.
6. **Garnish and Serve**: Once everything is heated through, sprinkle fresh parsley on top for a pop of color and freshness. Serve the chicken with generous spoonfuls of the mushroom sauce over rice, or alongside your favorite vegetables or mashed potatoes.
This Savory Herb-Infused Chicken with Mushroom Sauce is sure to become a favorite in your household. With its comforting flavors and easy-to-follow steps, it’s a recipe you’ll return to time and again. Enjoy your delicious creation!
https://hillrecipes.com/satisfying-your-cravings-20-low-calorie-recipe-ideas/
Subscribe to:
Posts (Atom)
-
Indulge Guilt-Free: Satisfying Low-Carb Comfort Foods You Can Easily Make at Home https://hillrecipes.com/low-carb-comfort-foods-satisfy-you...
-
 When you buy a radio controlled plane for the first time, you may have some difficulty choosing the plane that will introduce you to the r...